Tuesday, December 26, 2017

sun-dried tomatoes

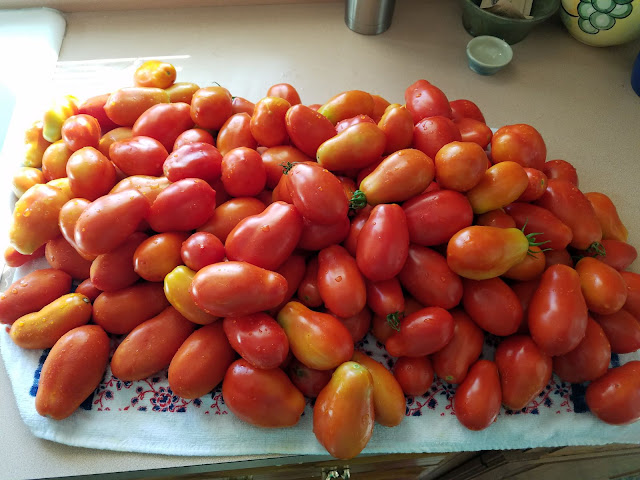
The year before last, after we had moved to this place, I had planted one tomato plant. And it did not disappoint me. It gave us enough tomatoes and more to last us for a long while. Then this year, I planted another one, and then I see these little tomato plants all over! I didn't have the heart to pull them out. Actually I thought they wouldn't grow! Was I wrong! I had so much tomatoes that I started drying them. A youtube video helped me here.

tomatoes


more tomatoes
and some more.....

drying


dried


in garlic and spice infused oil

yum!


Thanksgiving 2017

 Everything was new for me back when I was a newcomer to this country from where we did not have anything like this, starting with the equipment. I started with roast chicken and a couple of sides a year before my first Thanksgiving dinner. I had my first taste of roast turkey at my mother in law's. I remember cutting some  celery for the stuffing, for that dinner. Nothing else registered. In the meantime, I had found some recipes in a newspaper. I had never tasted those before, by the way. But I had written all the recipes down -- cranberry relish, stuffing, mashed potatoes, green beans with bacon, candied yam, cauliflower casserole, pumpkin pie. I got hold of a copy of Joy of Cooking, and it became my encyclopedia. I started studying roasting and baking techniques. And thus it began. My first official  Thanksgiving dinner was served around 18 years ago, using those recipes.

Most of the items that I served on that day, in our little apartment to family and friends, are still here.  With the arrival of the internet, things got more fun. I found that I enjoyed finding out the stories behind recipes, about cuisines of the world, about the parallels among different cuisines. And over the years, the menu has grown. so has the technique and equipment. For instance, I started brining the turkey, then dry brining. Now the turkey is roasted in claypot, and it has sprouted a few more legs!

When I think about it, I find that, for good or bad,  when things get easy, I have this urge to make them hard, and harder. I realize I like to challenge myself. It is as if I haven't done anything, that I did not put an effort, if I didn't almost  kill myself in the process, with stress and worry and work! Kidding! There is some stress at some point, but all in all, it s rather fun and invigorating. So the menu gets bigger. For me, that is. The fact that my family enjoys it is the bonus. Still, I do worry that I am raising expectations, and that I will let them down, let down myself. Well, that is me. Meanwhile, I have fun planning, scheduling and executing my menu. And I enjoy the sense of accomplishment once I have completed my work. I take pride in making everything from scratch, including the pie crusts and the bread or rolls. I am not sure how much longer I can pull it all off , as I get older. And when that day comes, sooner or later, I will have these as cherished memories. A record of a foodie.

Thanksgiving from around 18 years ago


Thanksgiving 2017

appetizers: cheese-spinach squares, marinated olives, spicy szechwan cabbage, nazrani meatballs, devilled eggs, lil sausages

pecan pie, pineapple snow, lemon meringue pie, apple pie


turkey roasted in claypot with a few extra legs, gravy, green beans with bacon, stuffing, cranberry relish, roast vegetables, mashed potatoes, waldorf salad, candied yam

and the bread


apple pie, creme chantilly, pumpkin pie, lemon meringue pie, pineapple pie, pecan pie


Thanksgiving 2016

I was very pleased to have made the mini rose apple pie! Lots of recipes on the internet.


mini rose apple pie

Filippino fruit salad, pumpkin pie, sweet potato pie, pecan pie, mini rose apple pie


apple pie from leftover apple bits and pie crust
mini rose apple pie


Wednesday, February 18, 2015

Chocolate dome cake with fresh strawberry filling

I made this cake for Valentine's day this year. Inspired by various online sources for pinata and dome cakes. Naturally, it is a fusion of all those.

chocolate dome cake with fresh strawberry and whipped cream filling


For the chocolate cake, I used my usual chocolate cake recipe, (Ina Garten's) - the one for an  8 inch round double-layered chocolate cake. You may use any other moist chocolate cake recipe you have, as long as you have enough batter for:
 1. an 8 inch dome pan/bowl and 2. a regular 8 inch x 2 inch round cake pan.
Wilton has a dome cake pan set which makes it all easier, but really we don't need that. It would be good to have one of those stainless steel trivets to hold the dome pan in place, both while we pour the batter in, and while we bake it in the oven.

Preheat oven to 325 F. Grease the pans liberally. Line the regular round with parchment too, after greasing. Grease the parchment too.
Pour the batter into the prepared pans. The dome pan should just be  three quarters full, leaving enough room for the batter to rise as it bakes. Pour the remaining batter into the round pan.

Bake the dome cake for 45-50 minutes. Check to see if it's done in the center. Depending on your bowl and your oven, you may have to bake it longer, till a thin skewer inserted in the middle comes out clean. The other round cake was done in 15 minutes in my oven.

Cool the cake in the pan on a rack for 10 minutes. Then invert the cake onto the rack. Let it cool completely. Overnight if you want. Don't put away the dome pan yet - we have use for it later. Once the second cake is done baking, invert that onto another rack, and remove that parchment off it. Let it cool too.

While it cools, we make the frosting for the outermost decoration. I used buttercream frosting for that.

Buttercream frosting recipe

1/2 cup (1 stick) softened, unsalted butter
2-3 cups confectioner's sugar
a pinch of salt
1/2 tbsp vanilla
upto 3 tbsps heavy cream or milk

Beat butter. Add 2 cups of the sugar. Add the salt, vanilla, 2 tbsp of the cream or milk. Beat well. Add  more milk or sugar little by little according to get to the consistency you want.


Once the cake is cooled, get that dome pan( washed and dried) and line it with plastic wrap, with enough wrap hanging out - very important! :)
Now place the cooled cake back in it, and leaving about 2 inches on the outside, score a circle in the cake using a sharp knife. An offset spatula comes in handy to scoop out some of the cake - cut it in pieces with the knife, use the spatula to lift the pieces- leaving a depression which you will fill later with that filling. When you scoop out the cake, be careful not to go too deep. Now I don't know if this helped, but I applied a thin layer of the buttercream frosting into that depression so as to seal it. Then I covered the pan with plastic wrap and chilled the whole thing for over an hour. Cut a very thin layer in a circle from the other cake too.

Now is the time to clean and dry the strawberries. And to make the whipped cream frosting or as they call it creme chantilly.

Creme Chantilly recipe:

1 cup cold, heavy whipping cream
1/2 tsp vanilla
2 tbsp granulated sugar

Beat until stiff peaks form. 

Slice the strawberries in half, and mix them with the whipped cream.
Fill the cavity of the dome cake which by the way is still inside the lined pan. Smear some of the buttercream frosting along the edge of the dome, so that it acts as a sealnt,  and invert the other (round) cake  onto the dome cake, like a lid. Press down gently and firmly. Cover again with plastic wrap. Chill. Chill. Chill. Preferably overnight. (You can make some cookies while it chills, or do something else or nothing :)

Now, make the chocolate ganache.

Ganache recipe:

5 oz semi-sweet baking chocolate
1/2 cup heavy whipping cream
1 tbsp butter

Chop the chocolate finely into a mid size bowl. Bring the cream and butter to a boil.  While still hot, pour it gently  into the chocolate and stir well till smooth and shiny.


Bring out the chilled pan with the cake in it. Carefully invert it onto a rack . Take the plastic wrap off the cake carefully. Pour the silky still a little warm ganache on top of the cake, making sure it coats the whole cake. Let it set for a few minutes. At this point you may decorate it with truffles or strawberries. Gently transfer the cake onto a cake circle.( I chilled the cake at this point, loosely covered with aluminum foil, for an hour or so. )

Now fill a decorating bag fitted with a Wilton #3 plain round tip, with that buttercream frosting and do whatever design you want on the cake. Or you could just leave it plain  or with that  garnish of  sliced or whole strawberries.
chocolate dome cake with strawberry filling


The whole cake can be made a day ahead. Just has to be kept chilled. Just be sure to take it out of the refrigerator a half an hour before serving .


chocolate dome cake slice


Sunday, January 25, 2015

Baked eggs in hot tomato sauce

Also called Eggs in Purgatory, this is an easy breakfast dish that tastes great, and looks good too. Thought to be have originated in Turkey and in Tunisia, this dish is called Shakshouka in the Middle East, and it appears in other parts of the world with slight or no variations. Thus it is similar to the Mexican huevos rancheros, the Portuguese and Spanish baked eggs, the Turkish menemen and so forth. Can be made on stove top and can also be baked in the oven. In Kerala, we have a similar dish where the eggs are in a lentil sauce, and another one in a spicy coconut milk bases sauce.

This recipe is a combination of all of those.


1 medium onion, chopped
6-8 cloves garlic, crushed and minced
1 large bell pepper, chopped
2 large tomatoes, chopped (use canned petite diced tomatoes - 2 cans - if in a hurry)
1 cup black beans (use canned to make it easy (1 can)  but that is not as healthy as when made the hard way, they say)
1 small bunch cilantro
1 jalapeno pepper, chopped ( I don't mind the seeds - but it adds heat, remember!)
1 tsp cumin powder
1 tsp dried oregano - if fresh, use more
1- 2  tsp  dried basil- if fresh use more
1/2 tsp red pepper
a sprinkle of paprika
black pepper, salt
4-5 eggs
Olive oil
grated cheddar - 1/4 cup or as much as you like

Soak the beans overnight (8 hours, more or less). Drain. Pour enough water to cover the beans, maybe a little over, bring to a boil, Simmer, covered. Cook till tender but firm (not mushy). Or, if you are using canned, you can skip all that. ;)

Preheat the oven to 350 F.
Heat oil in a skillet. Saute the onions and garlic till almost brown. Add the spices.
Stir. Add the bell peppers, cilantro, jalapenos, tomatoes. Stir around. Cover. Simmer. 20 minutes.

Remove the lid, add the beans now. cook some more till the sauce is thick.
Now, you may make indents in the thick sauce, Put a little dot of butter in each space,
and crack  an egg into each. Sprinkle the cheese on top of the eggs. Now there are two ways to do this. You may either cover the skillet and cook it for 5 minutes or so, or, bake it like I did here.
Bake at 350 F for 15 minutes, or until the eggs are set to your liking.

Garnish with cilantro or jalapeno peppers, or basil or all of those.

Serve with toast or tortillas, or pita, or Indian roti, It is even good with rice, for dinner.

Use less or more red pepper, according to your preference,  when you make the dish.


huevos rancheros


Sunday, January 4, 2015

leftover roast duck stirfry

It was roast duck with orange glaze for our quiet New Year dinner. Even though the duck was not that big, there was some meat left over. Enough for a quick stirfry.


I am not going to give a list here. Because there's n't much to expand on.

I had a small green bell pepper in the fridge. can use any other veg. I like bell peppers in stirfries. Heated a little oil in a wok and sautéd the green bell pepper first, and set it aside. Then did the same with some chopped onion + a few cloves of garlic, crushed/minced, in that oil.
Added a couple of tsp of crushed red pepper. Next, a few dashes of the sauces in the following picture:


That is, a splash of vinegar - say, a tbsp, 2 tsps of the sweet chili sauce, 3-4 tsps of the green chili sauce, 3 tsps of the  dark soy sauce. The aim was a sweet-sour-hot taste - just a teeny tiny hint of sweet and a little more sour and a lot more heat.

Anyway, stirred the thing around for a minute or two. Added the shredded (roast)duck. Gave a good stir. And don't let's forget the bell peppers, or broccoli or whatever vegetable you may have lying around. Added that now. Stirred it all around for some more.
 Should taste to see if you like the seasoning. Correct to your taste - salt and such.
If you still don't like it, nothing much you can do really, except tip it into the waste bin while no one's looking. Just kidding, you will like it. :)

Have it with some rice.

Now, you can make this using roast chicken or regular chicken, beef, or pork. Pretty much your basic stir fry. Just be sure to use thinly cut pieces. For instance, to make it easy, buy beef that's cut for asian-style stir fries. Or that Milanese cut , which you can further cut into smaller pieces.
This was the roast duck, btw.


Saturday, October 4, 2014

Asha's beef-potato-cabbage-sausage casserole


beef-potato-cabbage-sausage casserole

When the cold season strikes, these days, I somehow look to warm comfort foods with an Eastern European slant. This casserole is based on the cabbage-sausage-potato recipes that originate from that part of our world. The sausage that I used is one of the uncooked kinds, my favorite, the brat. You may reduce the amount of garlic and red pepper according to your preference, of course. By the way, this is not a healthy version, just plain delicious. :)

Ground beef - 1 lb.
Johnsonville original bratwurst -3

1 Savoy cabbage - shredded
6-8 medium sized Yukon Gold potatoes - sliced thin
Onion, diced small- 1 large
Garlic, crushed - 1 large  bulb
Vegeta seasoning (optional) - 1/2- 1 tsp
garlic powder - a good sprinkling in the meat and the veggies later
dried sage- 1tsp
dried marjoram - 1 tsp
crushed red pepper flakes - 4 tsp
ground black pepper- 1- 2 tsp
white vinegar - 2 tsp
salt
Olive oil, and/or butter - 2 or 3 tbsp

Draw a sharp knife down the middle of the sausage, lengthwise. Peel off the skin so as to remove the meat.

Heat olive oil in a large skillet or other large vessel. Saute half of the onion and garlic till almost brown.
Add the spices - 1 tsp of the black pepper, or more, if you like-  and herbs.Stir for a minute. Add the beef and the sausage meat. Brown the meat for a few minutes, Add the vinegar. Stir. Remove from heat.

Now add a little more olive oil or a little piece of butter to the same skillet or pot, and saute the rest of the onion and garlic till almost brown.  Add 1 tsp of black pepper. Or crushed red pepper if you like. Or both. No set rules. Fry for a minute. Add the potatoes and cabbage. Stir well so that the veggies are coated well with the spicy oil. Add enough salt to taste, Remove from heat. You do not need to cook the veggies.

Butter a large baking pan or Dutch oven. Place a layer of the cabbage-potato mixture in the pan.
beef-potato-cabbage-sausage casserole
Next add  layer of the browned beef-sausage mixture. Repeat layers ending with potato-cabbage mix at the top. Cover pan with aluminum foil.

 Bake at 375° for 40 minutes to an hour, till the top is browned a little.

PS: Browning the meat before baking is optional. Alternately, you can saute all of the onion-garlic at once. Divide into two. Mix one half with the meat, and the other with the veggies. Then do the layering, cover, and bake.

For the meat part, make it with just beef or just sausage, or more sausage, cooked or otherwise.

Serve warm with  rolls, and a salad, for health, and for color. :).


buttery rolls


Monday, October 21, 2013

easy spicy tomato- mozzarella bake


6 medium-sized roma tomatoes
1 package fresh mozzarella
1 medium onion, diced small
3-4 cloves garlic, minced
1 tsp red pepper flakes
fresh or dried basil
2-3 tbsp olive oil
salt
pepper

preheat oven to 400° F.

Grease a baking pan with a little olive oil

Cut the tomatoes in half, . Scoop out some of the pulp and seeds. Set it aside. Place the tomato cups in the baking pan.

Cut the mozzarella into cubes. Set aside.

Heat the olive oil in a skillet. Add the onion and garlic to this. Saute till the onions are wilted, and the garlic sends out its aroma. Now add the red pepper flakes. Add the scooped out stuff here. Stir well. Add enough salt, pepper. Remove from heat. Add the basil. Stir well.

Spoon the cooked filling into each tomato cups. Top with the cubed cheese.

Bake for 20 minutes.

That's all, folks!


Kerala Kanji unlimited — comfort food #1

 Malayali’s Kanji or Kangee is the best when made with our traditional “matta” rice - the plump, brown- streaked parboiled variety. The Chin...